
Return to Kite Menu
|
Fighter Kite
This relatively simple plan produces a highly maneuverable and
durable little kite. It has an uninterrupted face on which designs can
be placed. If built just right, this model will not need extra ballast
on the tail, but streamers glued in place make it look great.
|
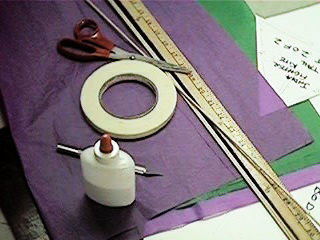
Materials for each fighter kite
- a ruler, a yardstick (maybe a protractor or
a compass too)
- one or more sheets of 20" x 30" tissue
paper of various colors
- two 1/8" dowel rods of about 36" in length
- one piece of 22" x 28" poster board if
making several kites from one pattern or newsprint if making only one
- a pair of scissors
- hobby knife and cutting board
- strapping or transparent tape
- white craft glue
This kite is most easily reproduced when a pattern is first cut
from another piece of paper or poster board. It is not necessary to
have an initial paper that is 30 inches straight across from which to
make the pattern. Since the pattern will not be seen after it is used
for tracing and measuring purposes, it can be made from bits of paper
or board taped together.
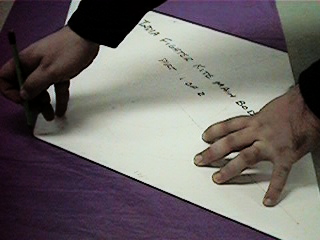
I cut my pattern from a single 22" by 28" sheet of poster board.
First I used a yard stick to draw a straight line
diagonally across the board out to 30
inches. Then I found the center of the line and used a compass to
construct a perpendicular line. Using the yard stick again, I made
the second line 18 inches long centering on the first line.
For the tail I measured an 8 inch line along one side of the board
and constructed a line perpendicular to it measuring 7 inches.
Connecting the ends of the first line to the tip of the second made
the triangle for my tail section.
After cutting out the pattern, I traced the two sections onto
light weight tissue paper. I have used two different colors both to
give a more colorful effect and delineate which section is where in
these photographs.
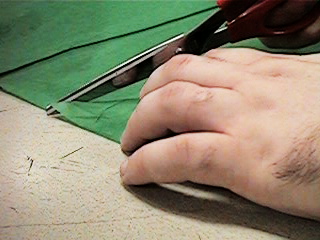
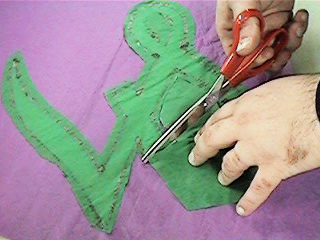
Using standard paper scissors, I cut out the traced pieces. Tissue
paper is a light weight material, so this can prove to be a delicate
task.
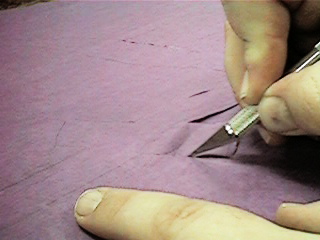
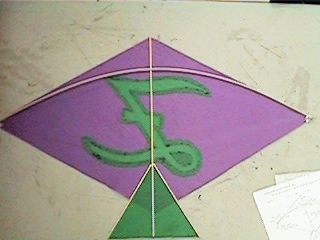
Since the broad kite face is excellent for a logo, I decided to
put mine on it. Using a pencil, I drew an outline on the front of the
body section. I could have also done this on a piece of newsprint and
traced it through the paper. Once drawn, the inside section is gently
removed with a hobby knife.
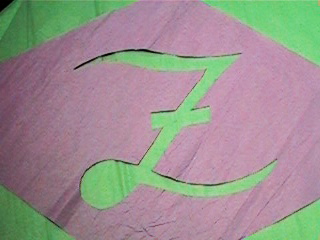
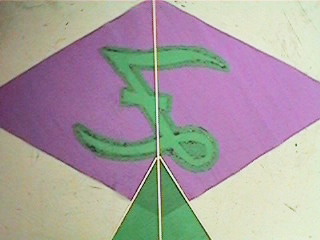
Here is the kite body with the hole cut into it. The green paper
has not yet been affixed to "patch" the hole yet. This is the way the
logo will look on the front of the kite when finished. Note that the
inside of the loop at the bottom is not present here. It will be
affixed later.
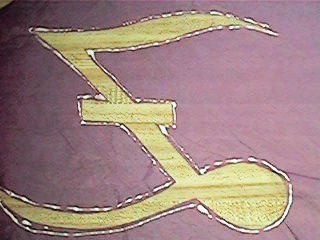
Turning the kite body over, a bead of white glue is traced just
outside the hole. The stream of glue must be fairly consistent, but
it can be remarkably thin and still hold very strong. Notice that I
got a little too much glue at the bottom.
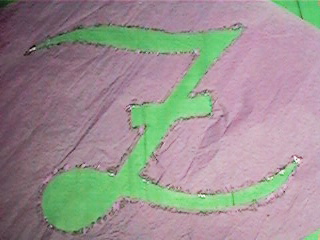
While still face down, the second piece of tissue paper was
delicately placed over the glued body. About 30 seconds later it was
turned right side up for inspection. The inside of the loop was also
affixed at this point.
Once the glue dried, the extra tissue paper was trimmed from the
back of the kite body. This task can prove even more delicate that
the initial cutting. Often it is easier to remove it in pieces than
to cut it all out at once.
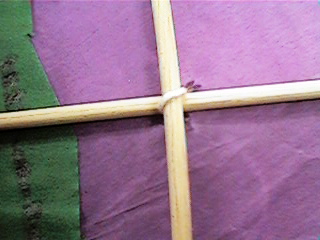
The next step involves placing the spars. Using a hobby knife or
scissors, cut the two dowel rods into segments measuring 32 inches,
20 inches, and two of 8 inches. The shorter dowels will be glued in
place first, with the longest one providing the taught structure for
the "wings."
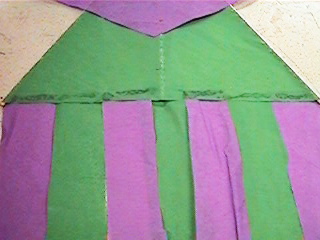
With the body face down again, the tail is placed on top of (as in
behind) it so that 2 inches protrudes below. A small bead of glue was
run along the 20 inch dowel segment before it was placed on the kite
body including the height of the tail. The two 8 inch segments were
glued in place likewise as shown exactly along the seam where the
kite meats the tail. The tail should not need to be directly glued to
the kite. Gluing it properly to the dowels, which are also glued to
the kite, should be quite sufficient.
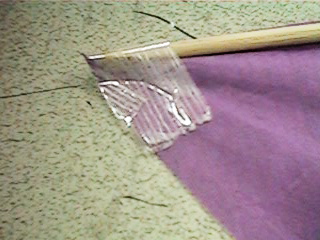
When the glue on the other dowels is dry, proceed with the bowed
spar. A single rectangle of strapping diagonally over the corner of
the tip of the wings holds it in place.
Once taped in place, run a small bead of glue only about 4 to 5
inches up each end of the bowed spar to help hold the tissue paper in
place near the wing tips.
Using scissors or a hobby knife, gently puncture the body of the
kite to either side of the keel dowel next to the bowed spar. The
bridle string runs from the front, through one hole, around the
crossed spars, and back out to the front before being tied off. This
will keep the dowels together during flight. Do not glue this string
or the dowels together here. There should be just a little play in
the structure at this juncture.
The bridle is also similarly tied directly to the keel spar at a
point 8 inches from the bottom of the tail. Since this end of the
bridle is not holding two dowels together, it would be a good idea to
put a drop of glue on the back to hold the string in place.
Since this kite is made to be delicately balanced and highly
maneuverable, I added streamers to the tail for stability. A thin
bead of glue is enough to hold them all in place.
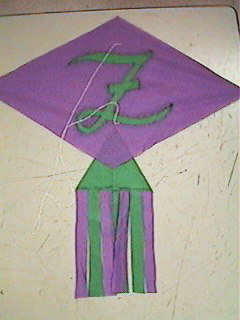
A loop was tied in the bridle string allowing for about half an
inch extra on the bottom segment of the bridle. For a less
maneuverable kite, the discrepancy between the top and bottom can be
increased a bit.
|Return
to top of page|
