Fugli's Fantasy ForgePaper making

Early medieval European monks and scribes would have used sheep, goat and calf skin instead of paper. Paper making was most likely first developed in Asia and spread to Europe slowly due to the church linking it to heathenistic practices. Also, since the process was often involved and consumed a lot of time, it would have initially been more expensive than parchment and vellum anyway. Eventually it was the black death that finally freed up resources, in the form of abandoned wardrobes, that made paper cheaper than the animal skin alternatives. When the price was finally right, medieval paper became the norm.

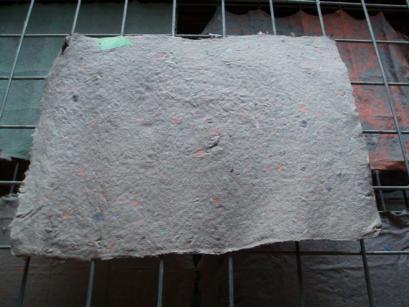
Medieval paper had a much higher rag (cloth) content than out modern wood pulp papers. This paper making process will support almost any material that you can make into a pulpy mass and suspend in liquid. So, while I generally recycle paper scraps, you can make some form of paper from old clothing, dryer lint, finely pulped wood shavings and even flower petals. The main difference is your use of a binding agent.

If you make paper totally from scratch, you will want some sort of glue (binder) to help hold it together. When recycling paper scraps, the binder is already present in the process, and you probably won't need to add more.
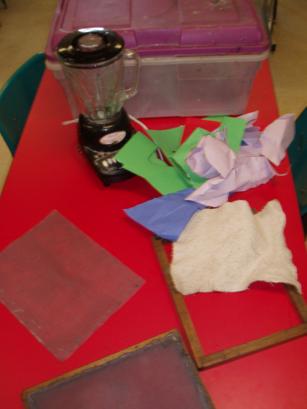
What you need:

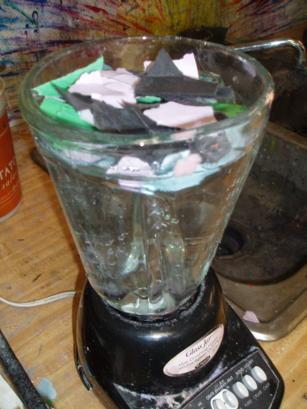
  • Paper scraps or some other fibrous substance (newspaper, old letters, old cloth, etc.)
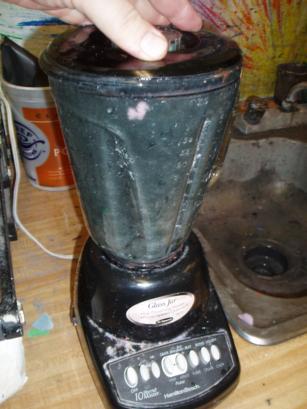
  • a blender
  • optional food dye
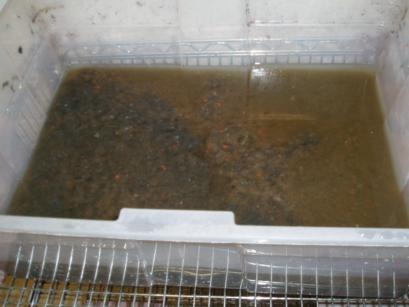
  • a large vat to hold water
  • optional Binder (water based glue, laundry starch, unflavored gelatin)
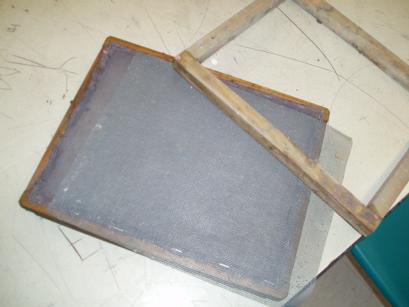
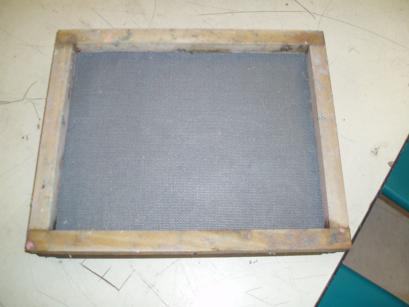
  • a mold and deckle
  • a soft towel or sponge
  • a drying rack
  • optional iron or heated press

The first step is to make a pulpy mulch of scraps. In this example I have used scraps of random paper bits recovered from old projects. (If you use something stronger, like old clothes, you will want to soak the material longer to soften it up before you try and mulch it.)

Tare the scraps into small pieces, the tougher the material, the smaller you want the pieces to be. Water has been placed in the blender first to keep the scraps from initially binding the blades. After putting a hand full of scraps on top of the water, the lid is held on top as the material is blended using the lowest setting of the blender first, and slowly cycling through to the highest. Any color present in the scraps will blend together as well.

If you want a specific color of paper, only use scraps of that color. You can also use dye to create different color effects if you like.

The blender is a time saving modern convenience simulating days, and possibly weeks of pulping by hand, but on a small scale. Many blenderfulls of pulp need to be mulched to suspend enough pulp in solution in order to effectively make paper.

To hold all the pulp, I use a plastic storage tub that I purchased at a local store. It is water tight, and deep enough that I can get the liquid depth higher than the width of my mold and deckle held together. The thickness and consistency of the pulp is up to you. By trial and error you should eventually be able to gauge just how thick the paper you wish to make should be. If I am making paper for a sculpture project, I usually want it heavy enough to hold its shape well. If I plan to make a print or write on it, I usually want it thinner.

If you do plan to write or paint on your paper, or if you make pulp from material that was not previously paper, you will want to add some binder to the solution in the vat in order to hold it together and seal it once it dries. If you have made pulp from paper scraps, there is probably enough binder already present in the solution for most purposes. Again, trial and error may be necessary.

A deckle is simply a frame with a piece of screen stretched across it that acts as a sieve. The mold is a second frame used to help define the edges of your paper. I include a second screen in the process between the mold and deckle combination. It makes it easier to remove the paper from the deckle later in the process.

Note that the screen side of the deckle is up (not down). The second (loose) screen sits on top of the stretched screen, and the mold is placed directly on top of the pile.

Hold them all together tightly for the next step.

First use your hands to make sure that the pulp solution is stirred up. Then, holding the mold and deckle combination together, and plunge them to the bottom of the solution. Hold them horizontal on the bottom of the vat for a couple of seconds while the solution settles, and then gently bob the frames to the surface. Pulp will be trapped on top of the deckle and inside the mold. Let the excess water run through it until it settles down to a slow drip.

Remove the mold and set the deckle someplace where it doesn't matter how much it drips. The very wet paper will be weak, so treat it very gently until it is fully dried.

Using soft towels or sponges, you want to soak as much water out of the paper as possible. I use cheap felt for a towel. It has a regular surface that does not stick to the paper fiber very much, it is very absorbent, and it wrings out well.

Initially placing the towel gently on the wet paper surface will soak up a lot of moisture. Once it is drenched, gently pull it off the paper still adhering to the screen and wring all the water out of it. Subsequent dryings may require some pressure to get more moisture out of the surface. Since the loose screen is not attached to the deckle, you can pull the paper up and bend it as necessary with the loose screen still attached for strength.

Use the towel at least half a dozen times to remove moisture from the paper pulp on the screen.

Once you have removed all the moisture that you can from your paper, you will need to leave it out to dry. Any mesh rack that allows the paper to dry from above as well as below is good. You can either leave the paper on the loose screen and remove it after it dries, or gently remove it as you place it on the rack.

After a day or so of drying, you will have a piece of paper that you can use. It will be a bit warped and perhaps lumpy. If you want a smoother, unwarped surface, use an iron or a press.

Through experimentation you can figure out how to produce various colors, thicknesses, and textures. You can even place your paper on and in objects while it dries, and it will hold its form. If you want interesting shapes and materials present in your paper, try tossing some cut out shapes, fibers, or dried plants into your paper before you towel dry it.


Return to top of page