 Space Bugs
Space Bugs
Space Bugs
The question has arisen, although not too often to be annoying yet, of why I do not normally sell my work. The answer is simple, few people want to buy it. (Make a reasonable offer, and I would part with most of my images.) Please keep in mind that in this world of stylistic niches, I occupy none and all simultaneously. My artistic training has been very general, and I tend to generalize my skills over a broad spectrum, occupying no individual niche or style for two paintings in a row. I have spent my time in advertising design, and as a village potter. What do I normally do these days for cash? I... um... teach high school art. It is not an extravagant existence, nor am I usually appreciated by those students who just enrolled because it sounded like an easy class (hint: it's not), but I do get to create all sorts of off the wall paintings and use them as examples.
Now there has been the occasion where someone has called me up and asked for something specific, but those are rare and I do not usually actively solicit such jobs. There is something very freeing to be able to brainstorm, conceptualize and create an unplanned or uncommissioned image all my own. The web just allows me to spread it around.
This site and others like it are part of my ongoing artistic endeavor to create free form artistic references in cyberspace. No tax dollars are used from any national endowment program, but since I do do web consulting for a couple of places (including school), I get to take most of my magazines, computers, and imaging software off my taxes. Yes, I have taught several students to tag in hypertext, and I use material like this page as examples.
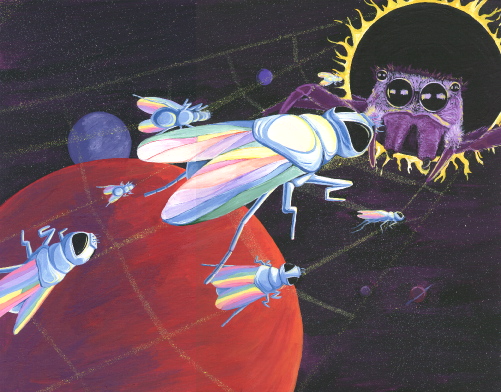
Now, with that said, I have another step by step creation to show here. This one will be in color, but we will use relatively simple machinery to create it. For lack of a better working name, I called it "Space Bugs."
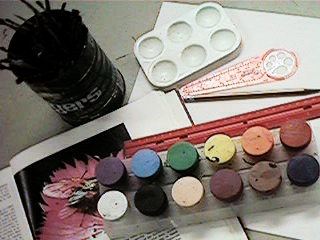
Most of the materials used in creating this image are pictured here. It is painted on the white back of an old piece of scrap mat board cut to 11" x 14". Both cheaper and smoother than canvas or canvas board, either side can be used depending on the opacity of the paint and what over all background colors are desired. Also on the table is standard #2 pencil, a reference book on insects, a tray of acrylic paints, a mixing palette, a ruler, a compass, and a bunch of clean old brushes (including a couple of old tooth brushes). Not pictured here is some heavy stock scrap paper used for masking later, and a can of matte fixative used to eventually seal the paint.
[Yes, those are the same paints that I use to paint miniatures.]
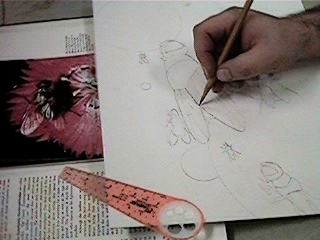
The first step in any picture is a basic contour line drawing. The more detailed the drawing, the easier the painting will be later. Here the basic insect image is broken into basic geometric shapes and drawn as a wire frame image. This technique allows for the same basic forms to be rotated into seven different positions. Thus the same basic reference is used for all of the fly-like insects in the picture.
Circles are drawn in the background and overlapped behind the foreground forms. These will eventually look like planets and add to the illusion of depth in the picture.
[Check out the compass. I always used the sharp pointy caliper ones before, but I found this type about two years ago. I think that they are wonderful, and use them exclusively these days.]
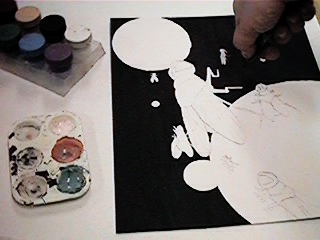
The starry background is now added. The tool of choice here is a toothbrush dipped in some acrylic paint and splattered over the picture with a thumb. This is an omnidirectional tool, so a spatter guard of scratch paper has been placed on the table. There is no use in protecting the thumb from the splatter, just wash the hand afterwards and it will clean up easily enough. The stars are splattered now so that the rest of the picture can be painted without later masking for this step.
Again, we might be tempted to just splatter white stars over the background, but this is a color picture and we will use color to our advantage wherever we can. The stars are splattered in two layers. The first stars are a medium tint of blue green, while the second splattering are a light tint of red orange. The use of first cool and then warm coloration will help create more depth in the background.
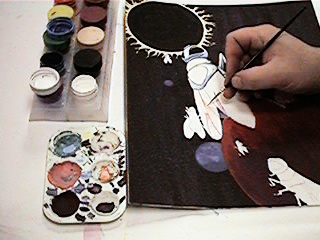
At this point most of the details are directly painted over the still present pencil contour lines. Note that a light source has been defined in this painting as being roughly in the center of the black sun. It does not necessarily make sense for such an undefined space object to radiate light, but it seems to make visual sense and it servers as an easy reference for the source of light.
[As for what the black sun actual is at this point, I do not know. People asked me, "hey, what is that?" I answered, "I'm not sure, but I think it looks neat so I'm going to use it that way." As the artist we can define things that do not exist, the trick is knowing how to make the object the right way, and then knowing what rules are being broken.]
The insect shapes are created with various tints of blue and straight white with a light tint of yellow (cream) for highlights facing the light source. This coloration gives them a sort of chrome look. The planets are done in various violet color ranges to make them appear to recede in space behind the bugs. The closest planet ranges from violet in the shadows to red orange in the highlights. Overlapping goes a long way in defining its visual level in the painting.
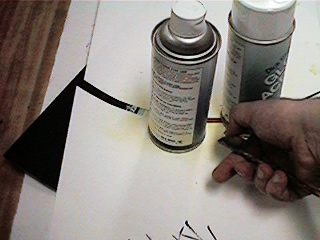
At this point the picture is at its originally intended ending, but last minute inspiration takes over. Carefully using heavy paper and a couple of fixative cans to mask the edges, a sort of cosmic web is carefully added by once again splattering it in with a toothbrush. The splatter is done with a light tint of yellow (cream), one segment at a time. the cans are used to define the end of the segments and to weigh the mask down.
The good thing about using a toothbrush over an air brush to do this is that the mask does not blow up from air pressure.

Finally, the black hole spider is carefully painted crawling out of the sun. Another reference picture was used for this one, and it has been rendered in violet with cream highlights. The first layer of the spider is straight violet with some black mixed into the dark shadows. The second layer consists of a medium violet tint dry brushed carefully to look like hair. Lastly, the cream highlights are added.

As a final step, mate fixative is sprayed over the picture. This will help protect the image until it gets matted and placed in a frame.